The Crafter’s Companion - Creating Bows
by Beate Johns
Tie a perfect bow every time with The Crafter's Companion.
.jpg)
Step-by-Step
-
Step 1
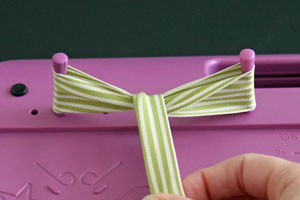
Place two pegs from the storage area of The Crafter's Companion into holes on the side with the Envelope Maker.
Hint:
The wider the ribbon, the further apart the pegs should be placed.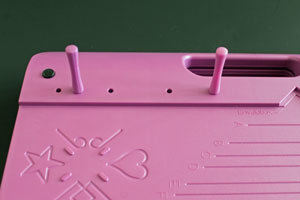
-
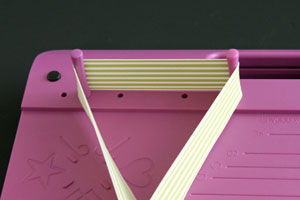
Step 2
Wrap ribbon around pegs.
-
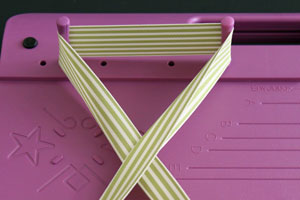
Step 3
Cross the right end of the ribbon over the left.
-
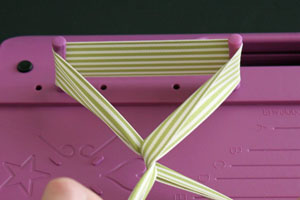
Step 4
Fold the same piece back under to the right hand side.
-
Step 5
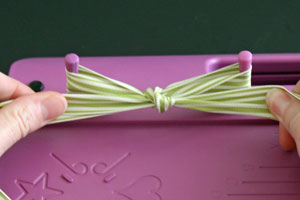
Take that end of the ribbon and thread it underneath the ribbon that is supported by the pegs.

-
Step 6
Fold the ribbon back over to the front.
-
Step 7
Tie a knot to hold your bow in place.
-
Step 8
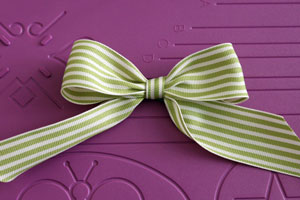
Take your bow off the pegs and cut the ends. Your bow is done.
Video!
Your Turn
You've seen the tutorial, now you try it! We've got a section of the gallery set aside for The Crafter’s Companion - Creating Bows. Try this technique, then upload your artwork to the gallery. Show us your creations!
***Please note - Internet Explorer/Edge is not a supported browser, and will not allow you to see the videos. Please use Chrome, Firefox or Safari to view our tutorial videos.
 *
*
Questions and Comments
We'd love to get your feedback or questions. Leave your comment below.
Could you demo the star and/or the heart cards? I have wasted more paper than I care to admit trying to figure it out.
Is there a guideline you can give us on how many inches of ribbon it takes to make a perfect bow, with short tails (for example, with different widths of ribbon)?
Thanks so much,
Jennifer
Dian
Page 1 of 1 pages